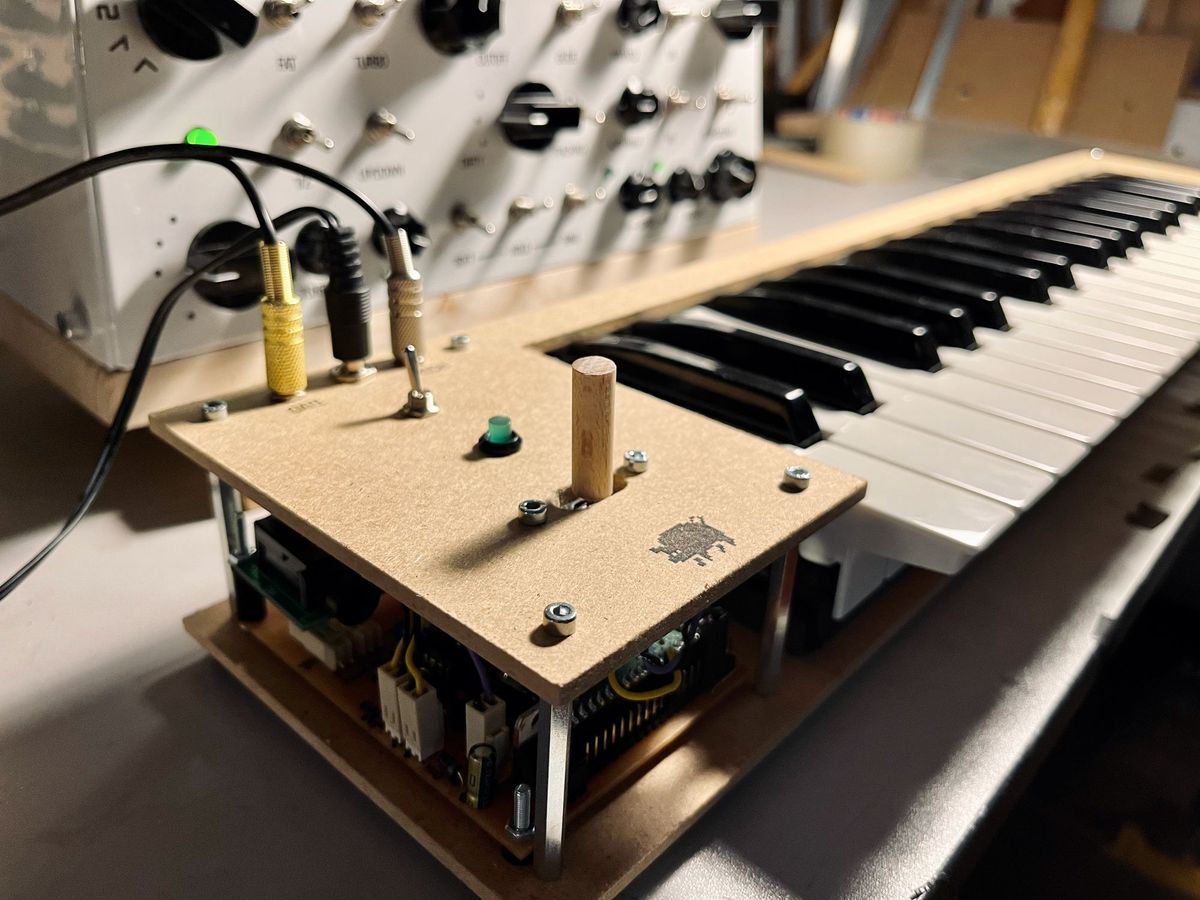
CV keyboard
Combo of an old MIDI keyboard and a Raspberry Pi Pico MIDI to CV converter
Schematics and code
 peterzimon
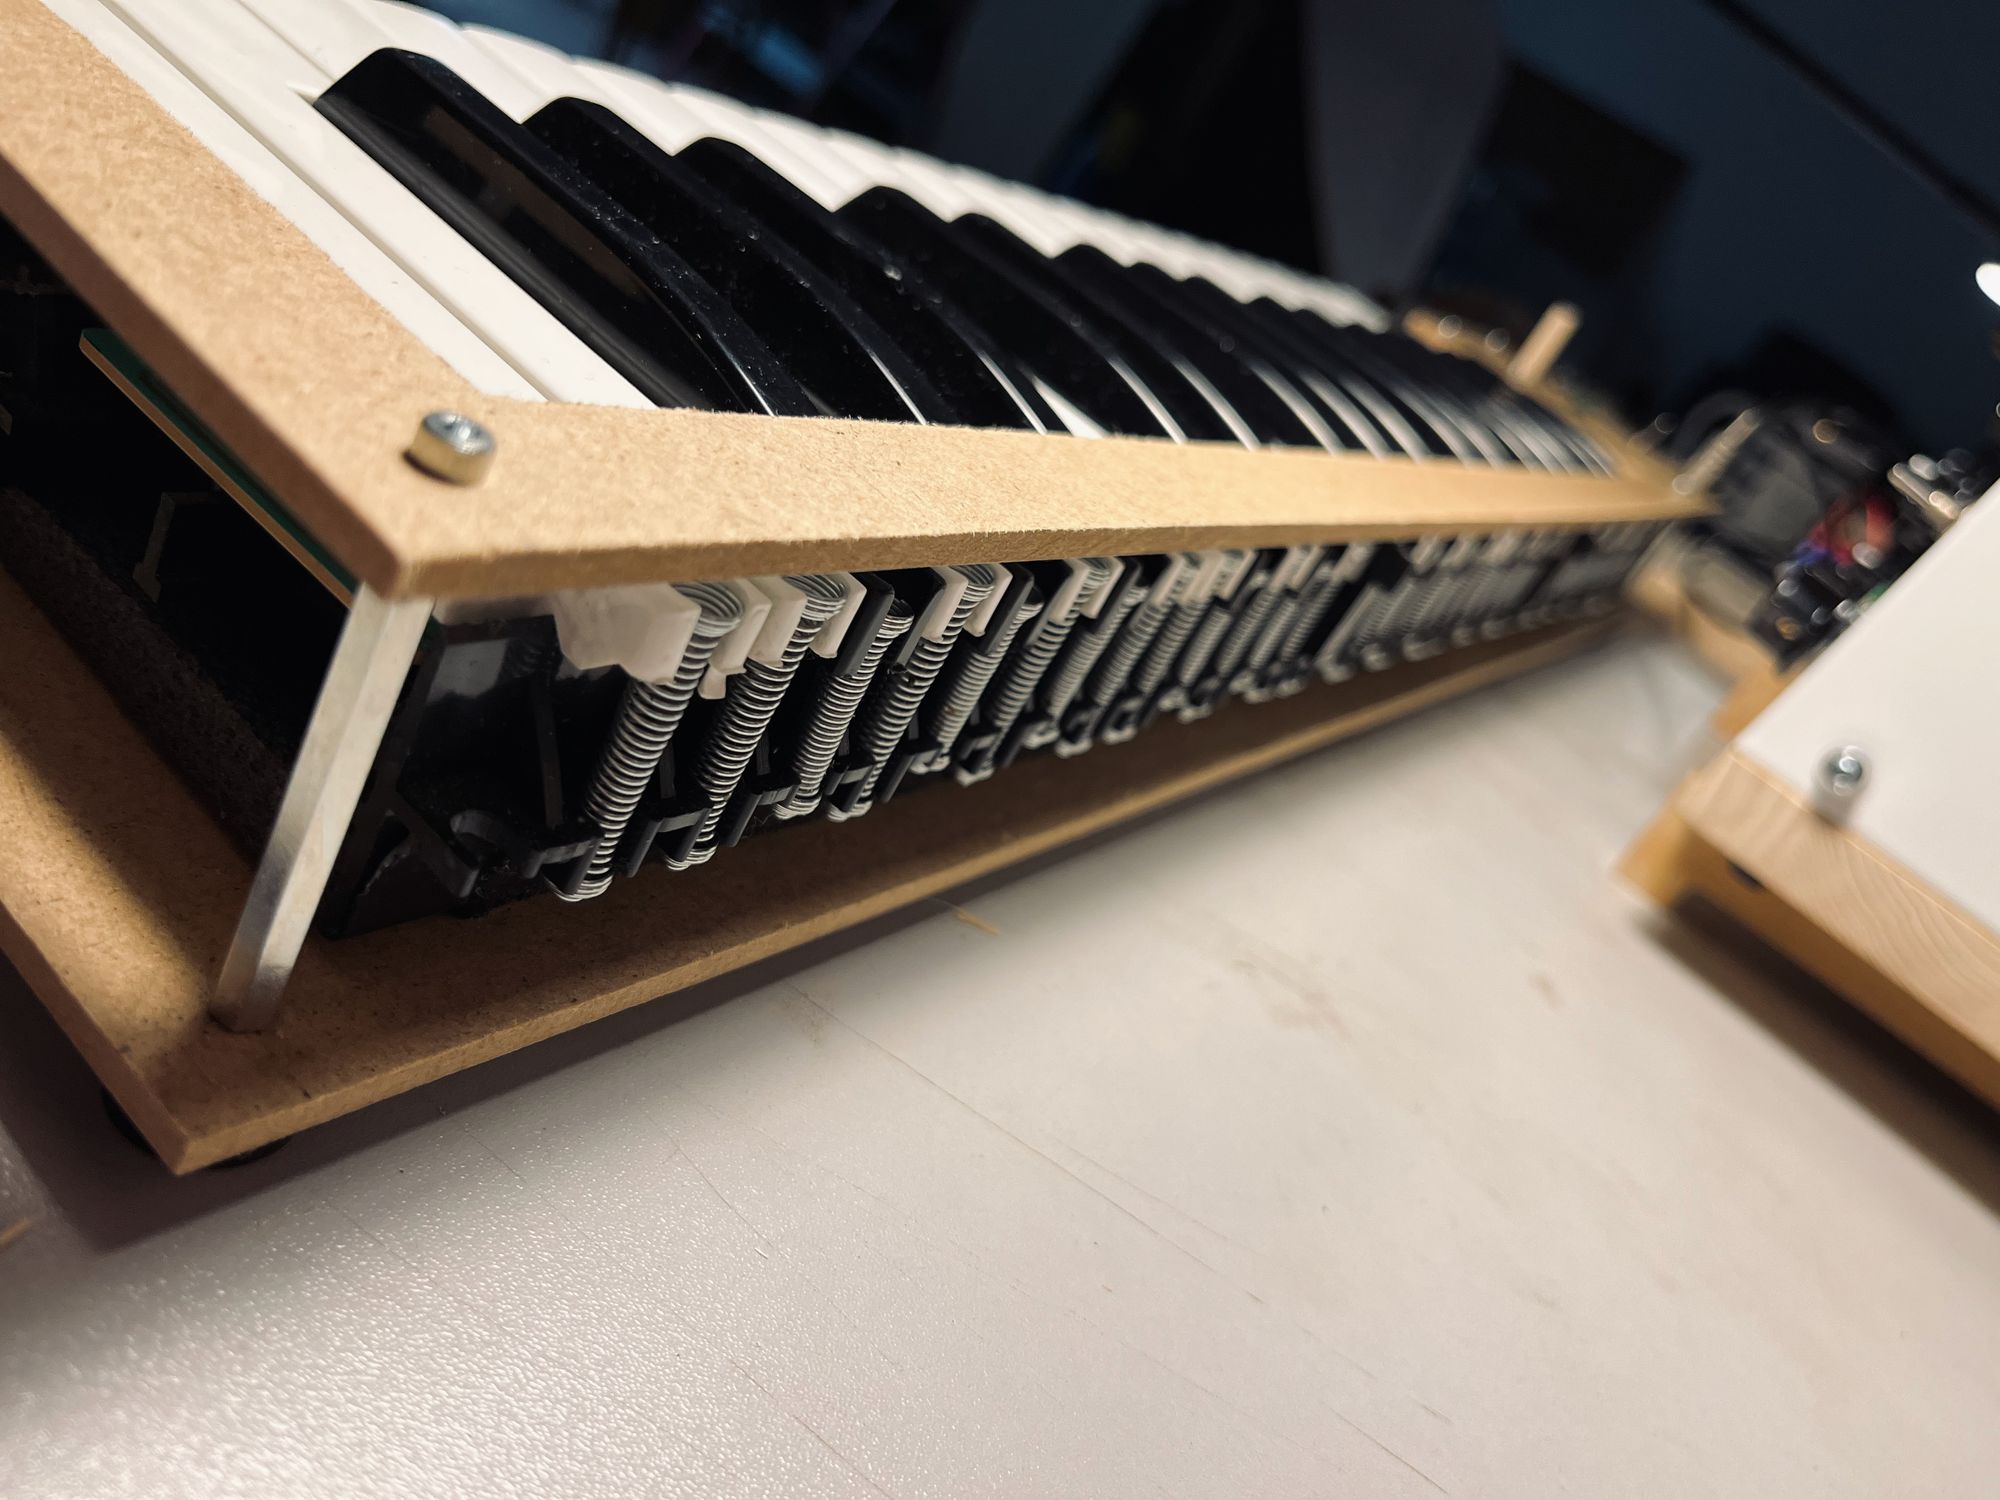
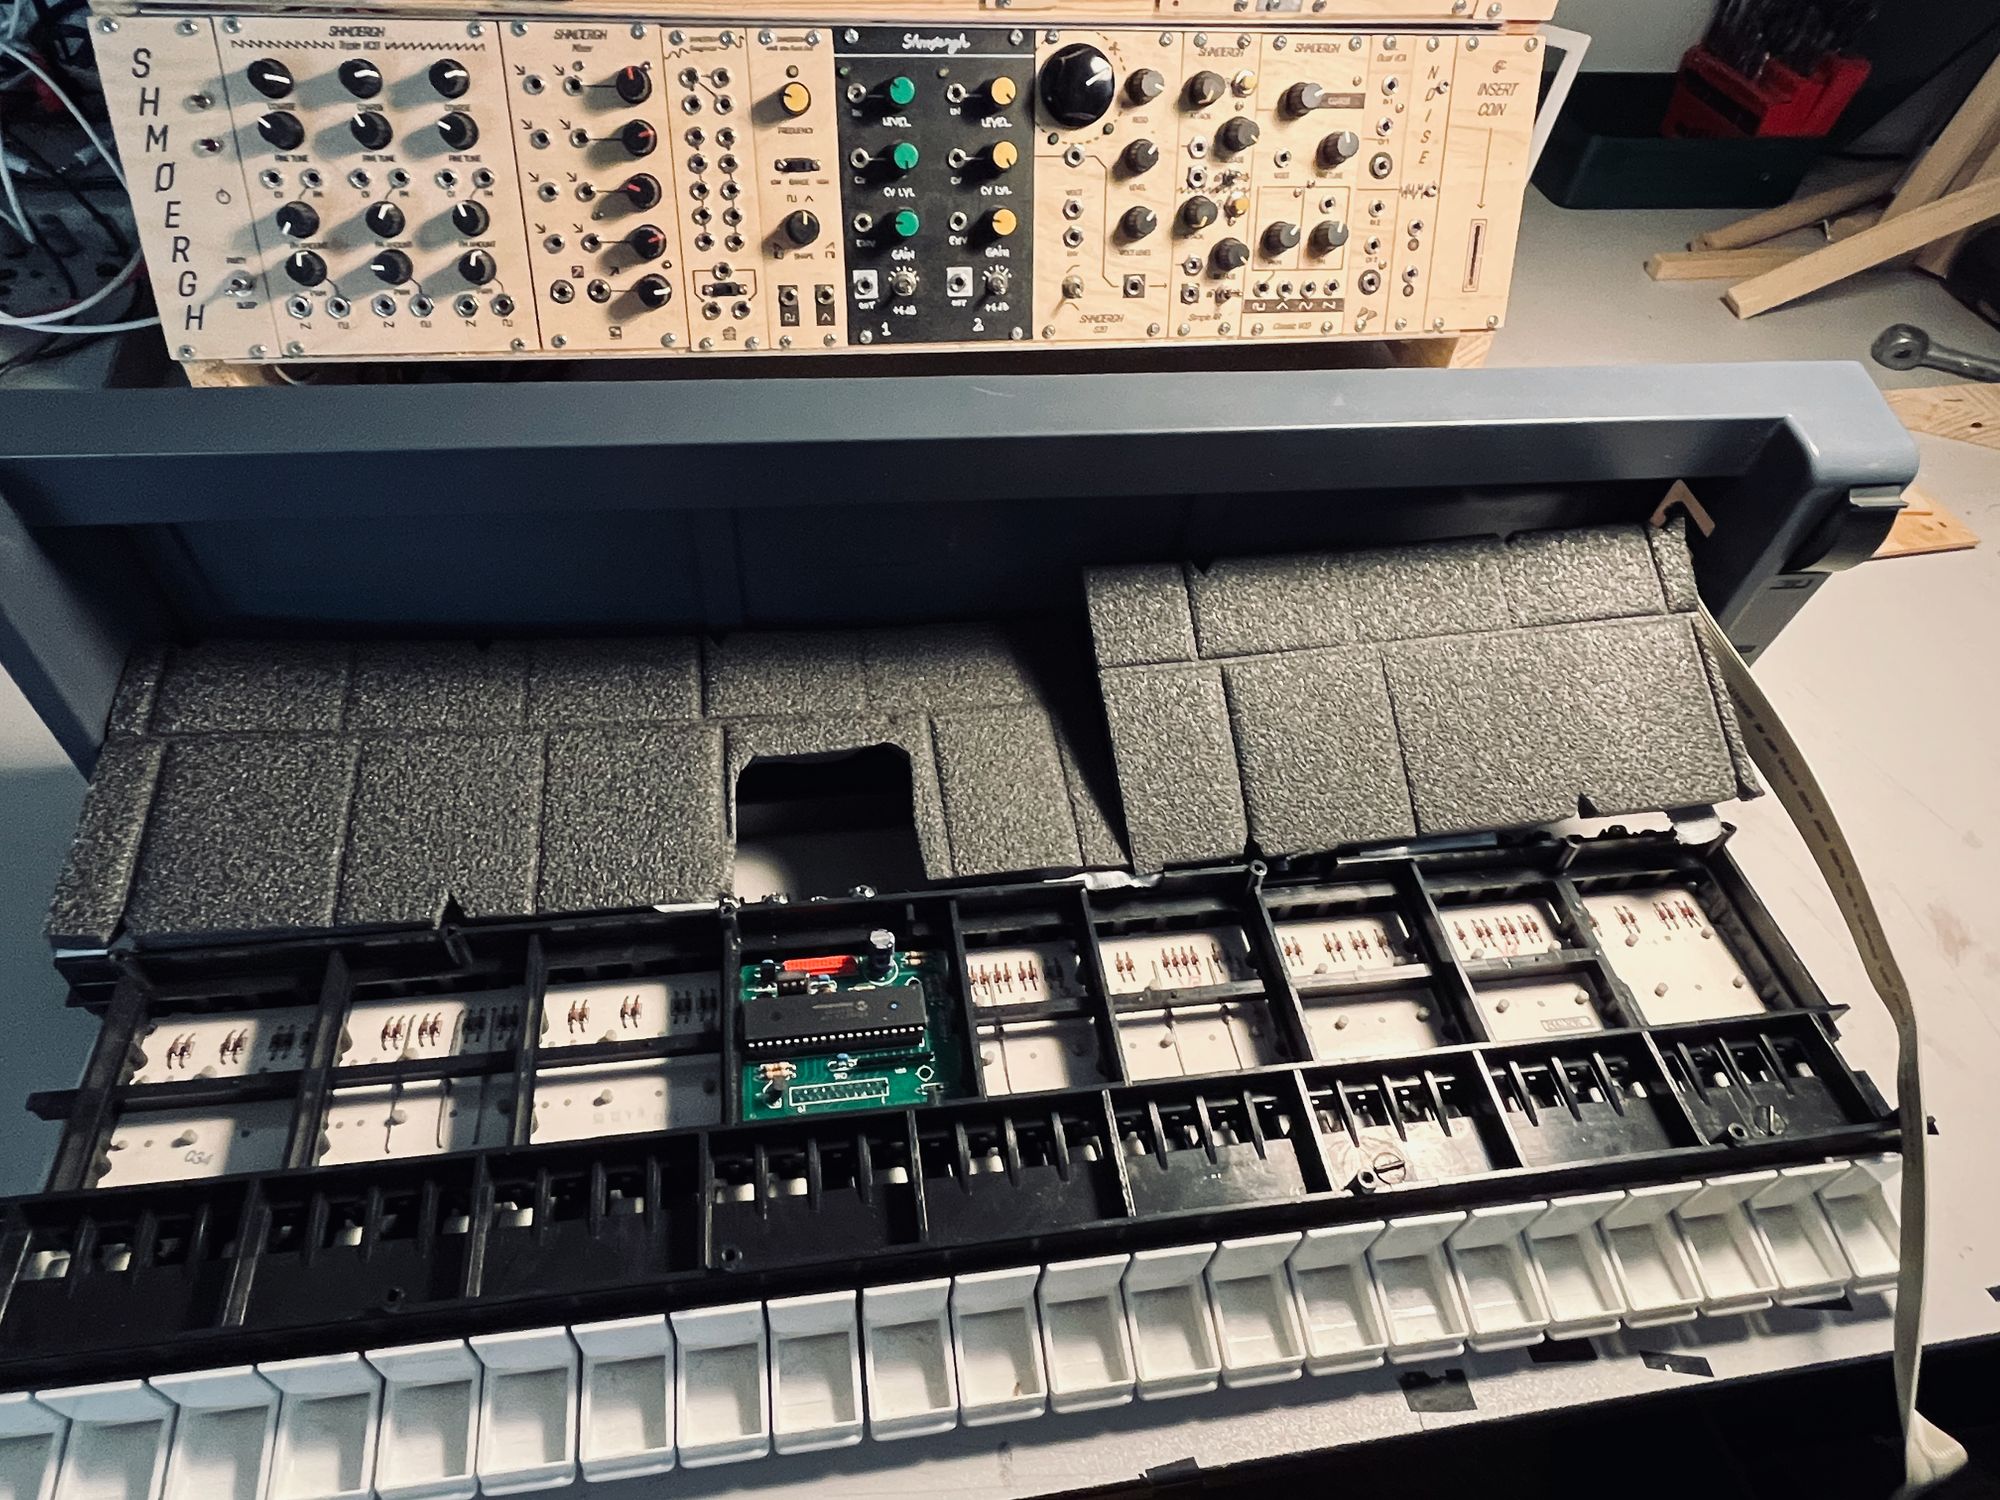
Okay so my idea for the future version of the next synth is to somehow stuff all the cables and circuits in a case along with a keyboard so it's a standalone, plug and play instrument. A key component for this which was missing is the keyboard.
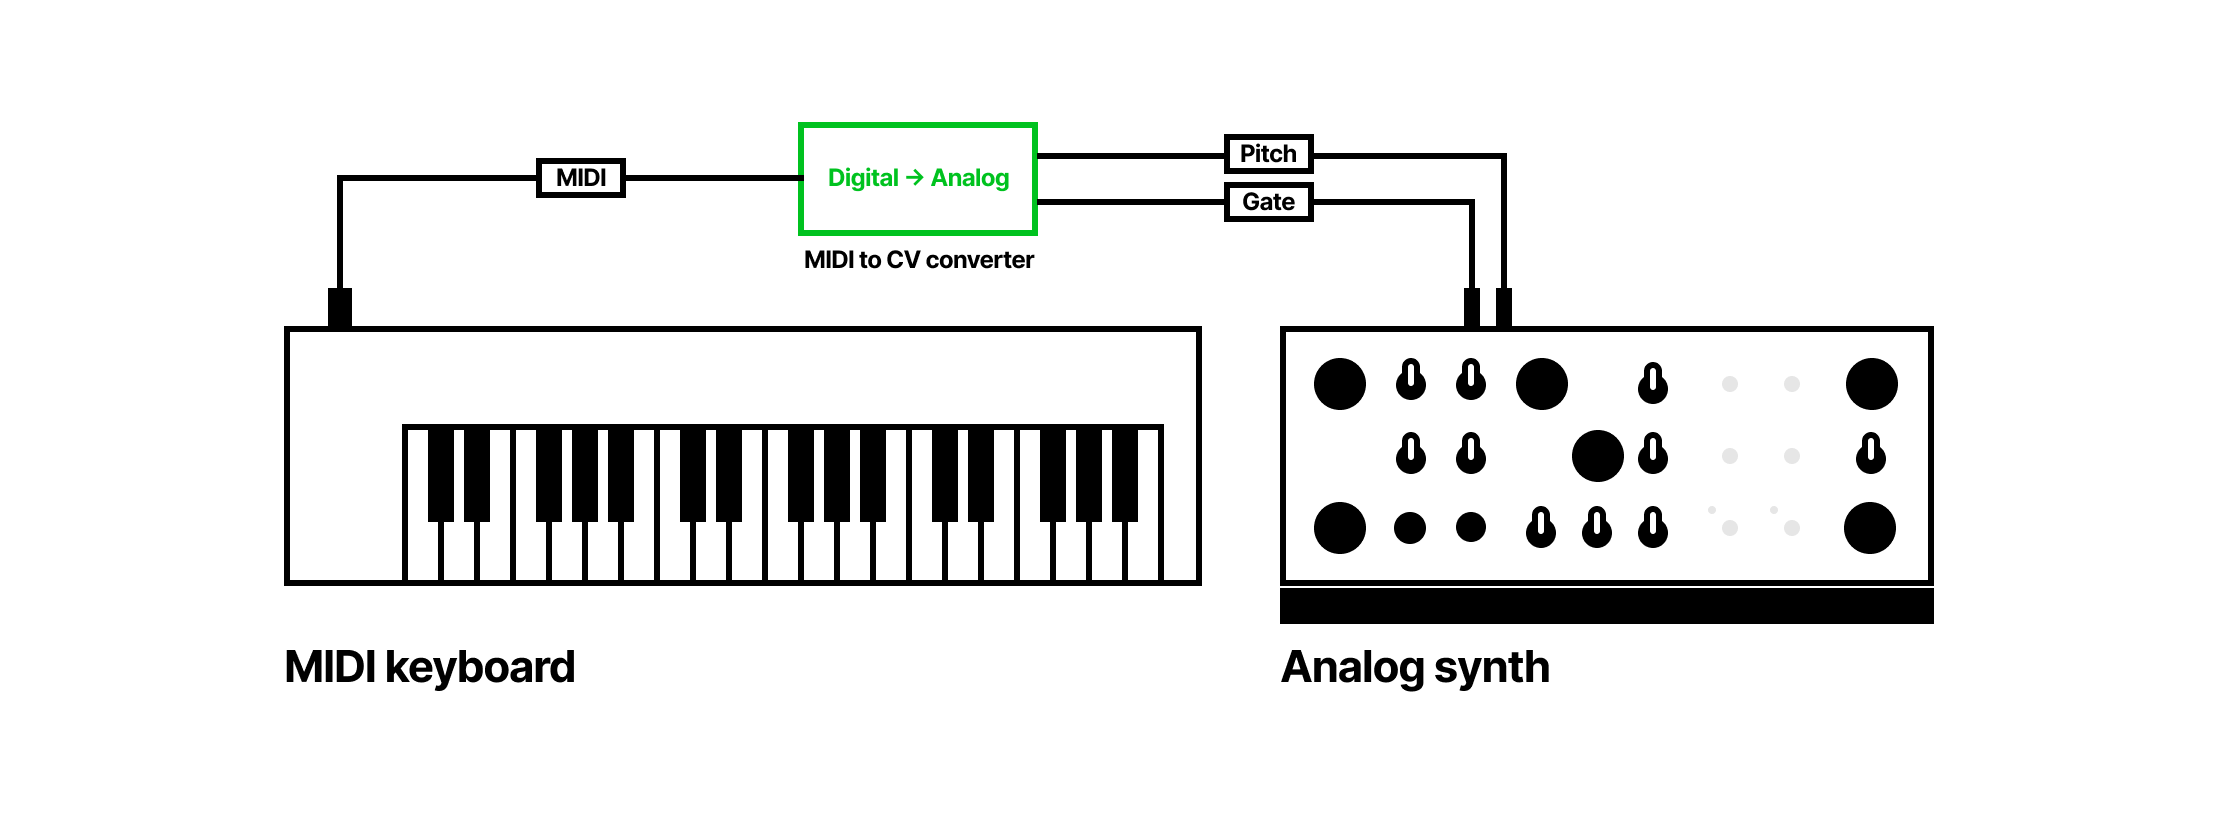
So I decided to take an old MIDI keyboard apart and rebuild it in a way that it can communicate with CV controlled analog synths.

MIDI
MIDI has been the communication protocol between different digital “things”, mostly musical instruments but also lights and many others. It’s been designed so well that it hasn’t really changed much in the last 380 years (okay, it's around since 1981) and all keyboards and controllers implement it even today. These keyboards and controllers don’t produce any sound, but only send control signals in the form of MIDI messages to instruments, synths or computers that interpret these messages and make the sound accordingly.
A MIDI keyboard or controller can be plugged directly to digital instruments like a digital synth or a computer. However the Hog is an analog synth which can’t understand digital signals, instead it communicates with voltage levels.
Control Voltages
An analog synth – just like any system – has different modules, each one being responsible for a particular job: there are oscillators which generate the sound, there are filters which shape the sound by manipulating frequencies, modules that will make the synth only send the signal to the speakers when a keyboard is pressed and so on. These modules need to communicate with each other and in my synth – like in most analog synths – this is happening through “control voltages” or CV.
CV is a very simple concept: you take a wire with a certain voltage level sitting on it and insert it into a module’s control input. If you change the voltage on the wire it’ll change some behavior of the module.
First test
MIDI to CV
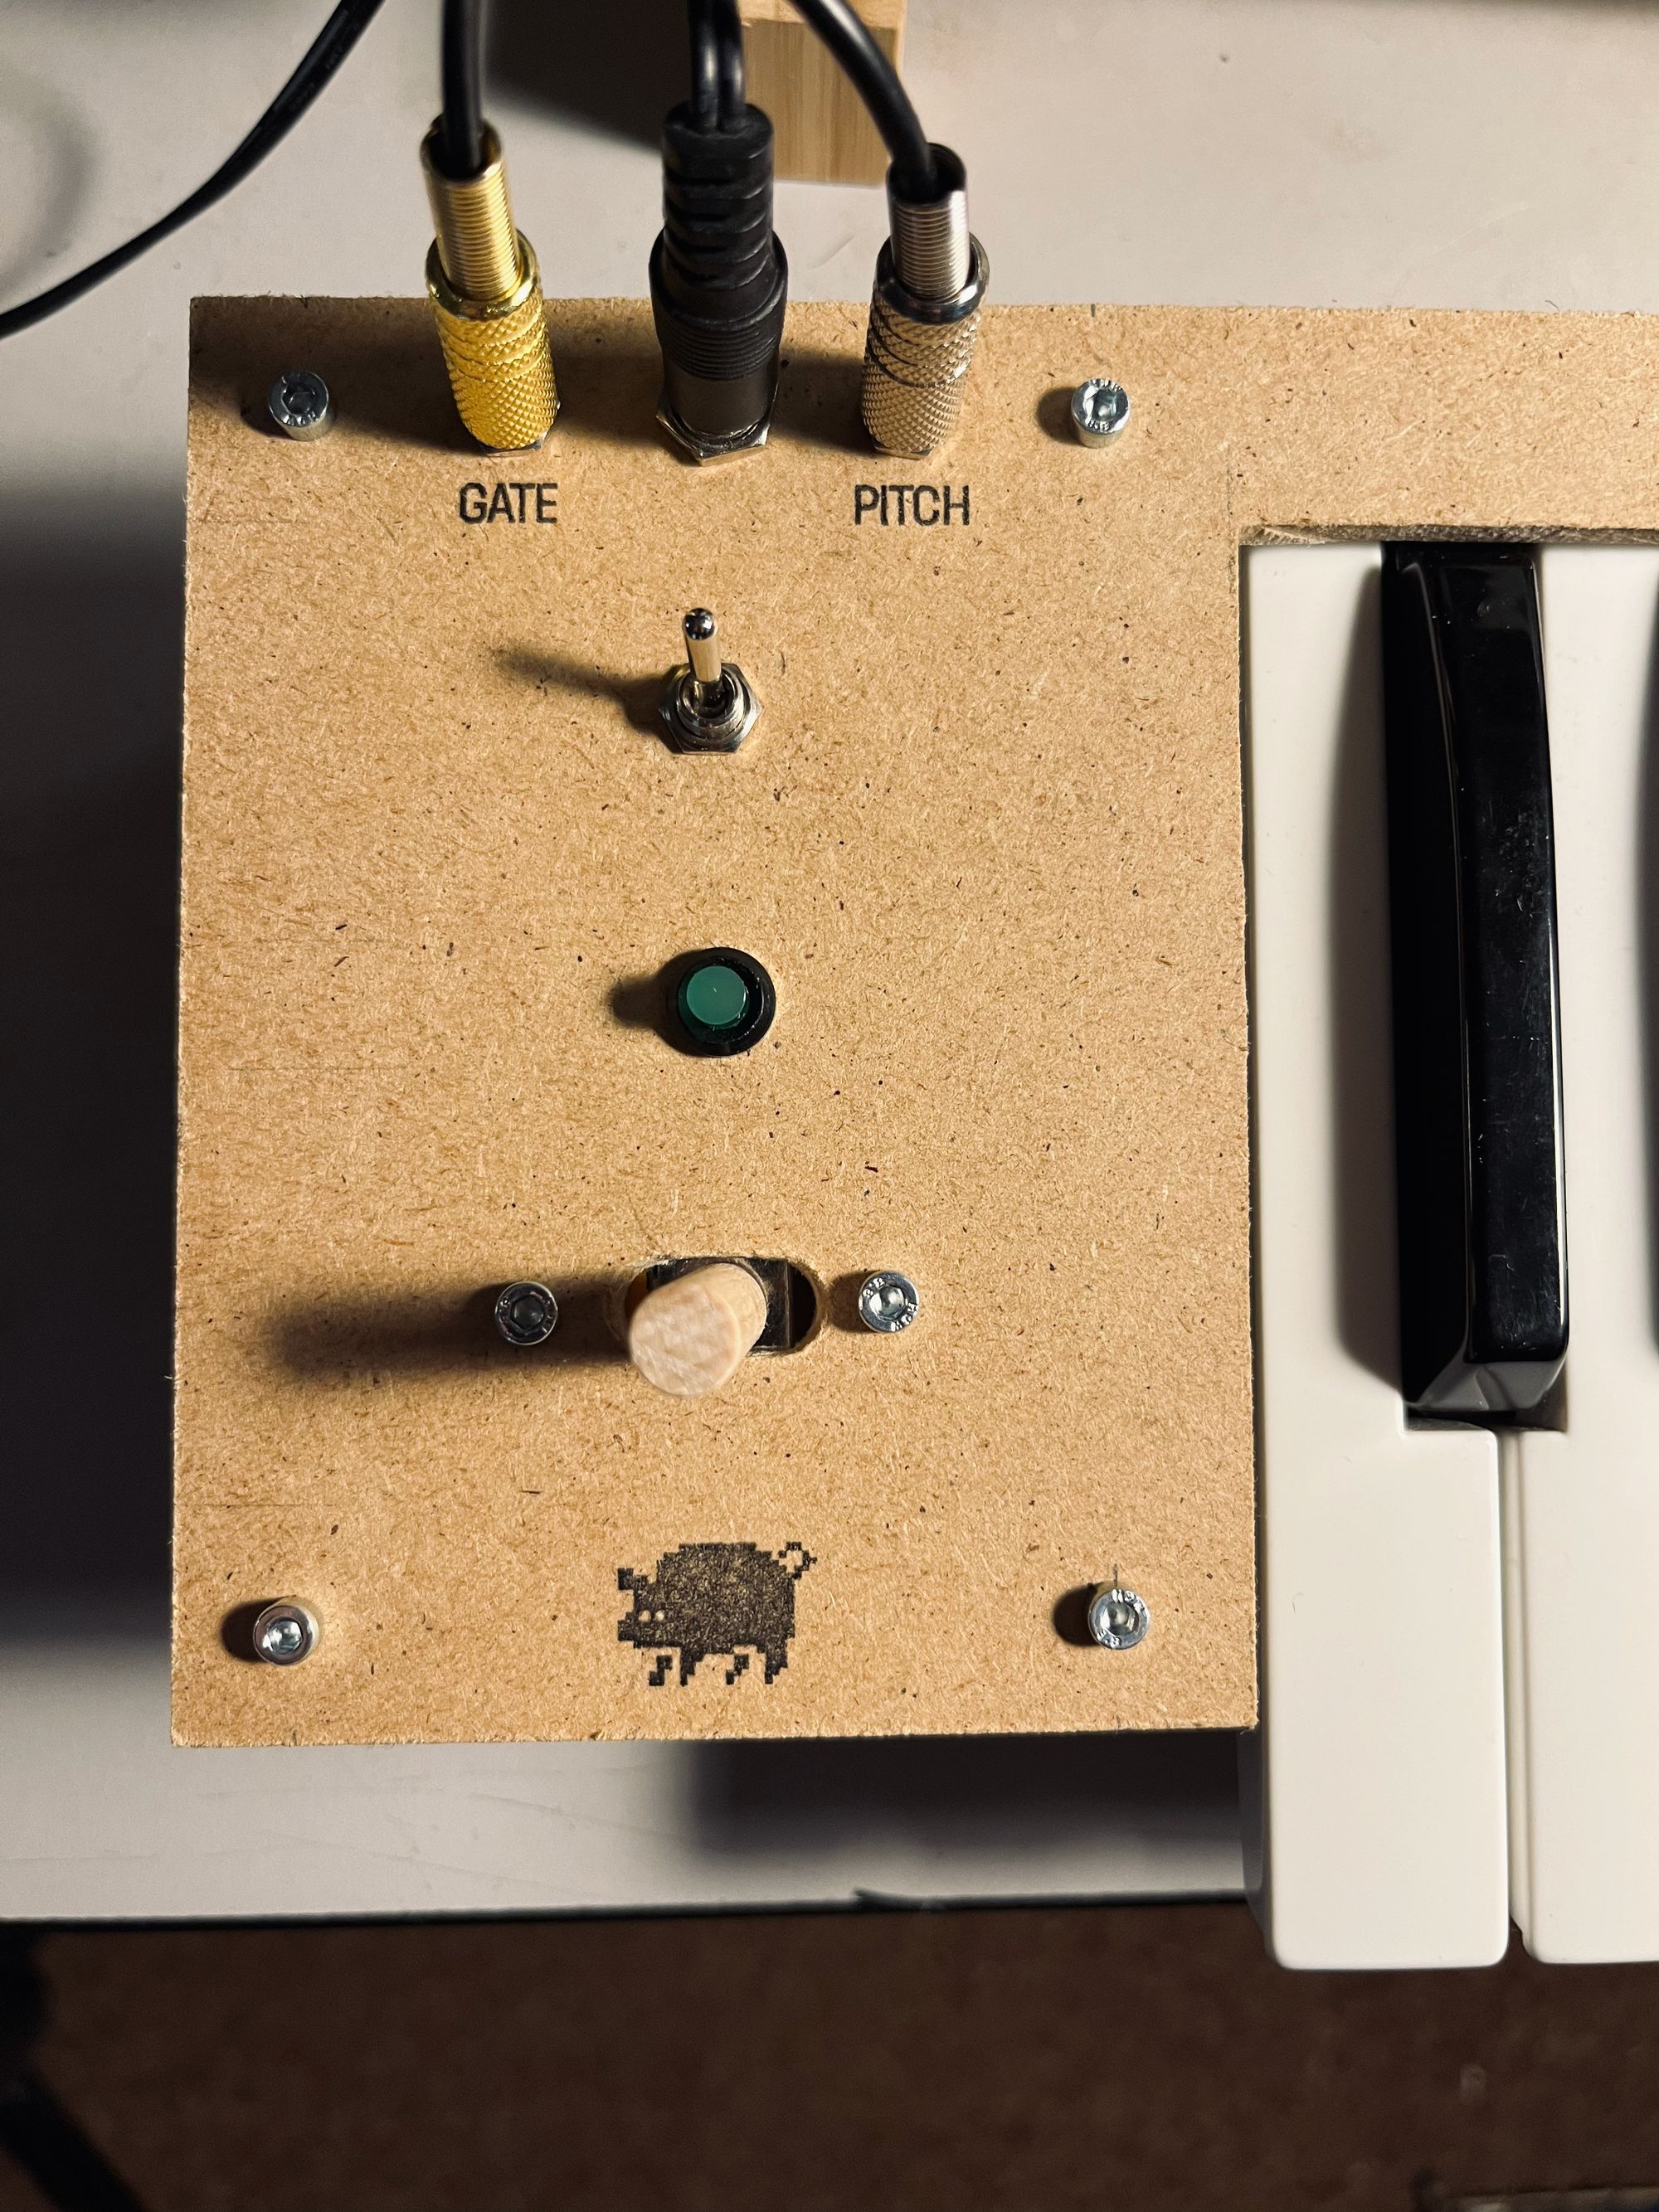
In my case there are two control voltage signals:
- A gate CV which sets when the note should sound. The oscillators are actually constantly generating waves but there's a circuit that mutes them or let them through to the speakers. This mute mechanism is controlled by the gate CV. If you set the gate to 5V you'll hear sound, if you set it 0V then you won't.
- A pitch CV sets the note, ie. how low or high the oscillator should generate the waves. This CV is actually a range of voltages (0-10V) where 1V difference means 1 musical octave change: 1V will make the oscillator generate waves an octave lower than 2V would.
As we said, this analog synth is totally incompatible with MIDI (which is digital) so I need a device that acts as an interface between the two: a MIDI to CV converter.
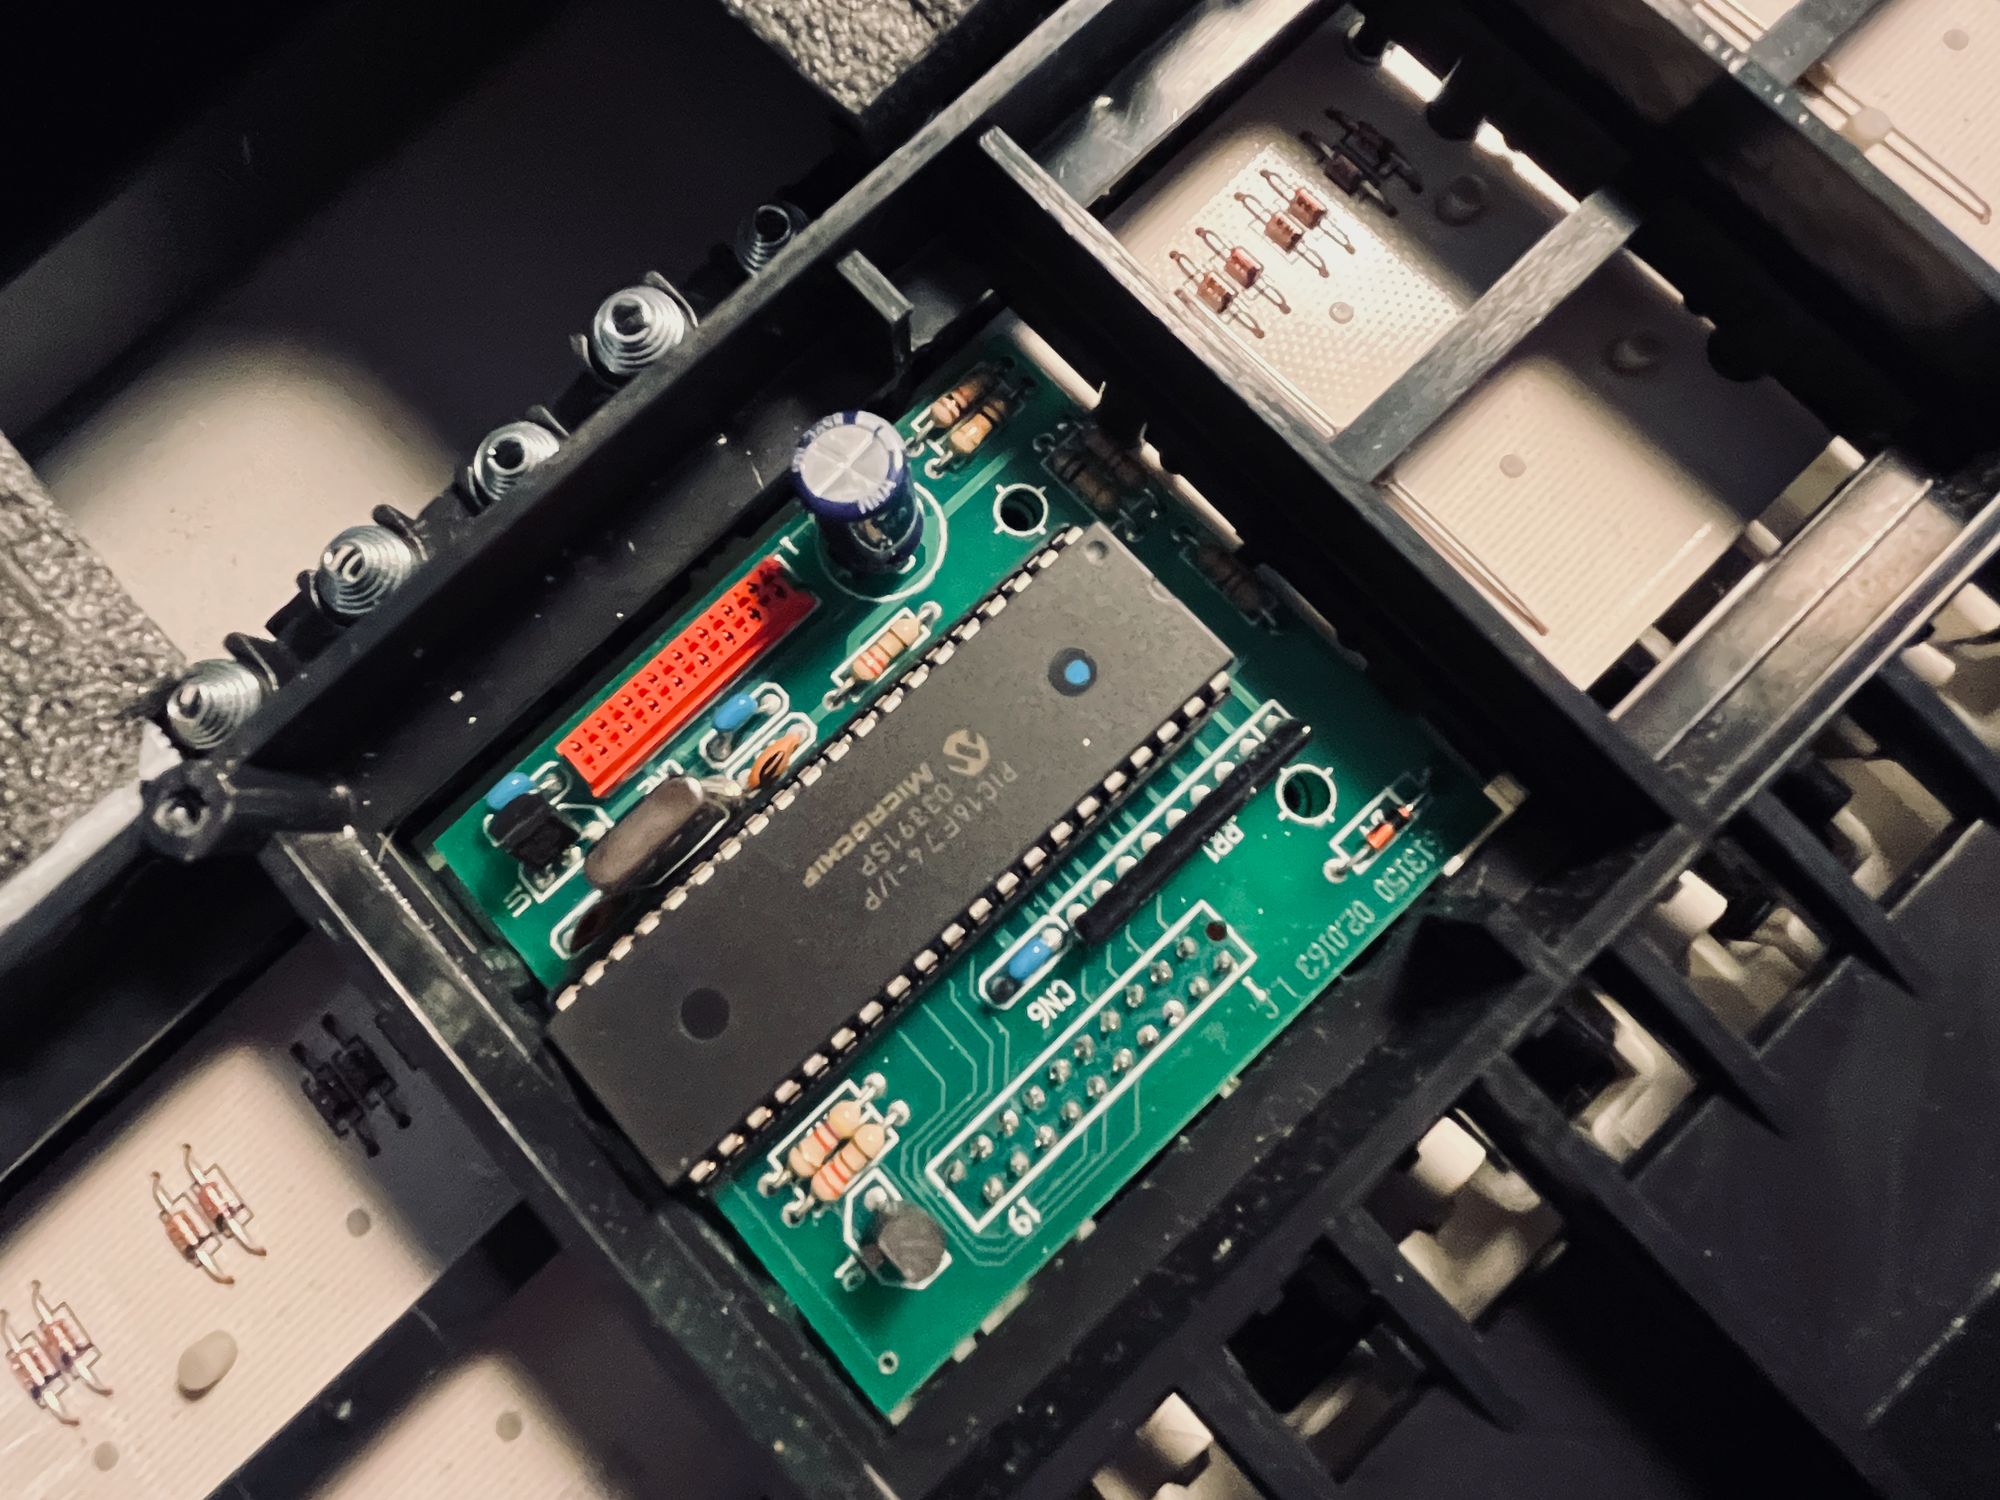
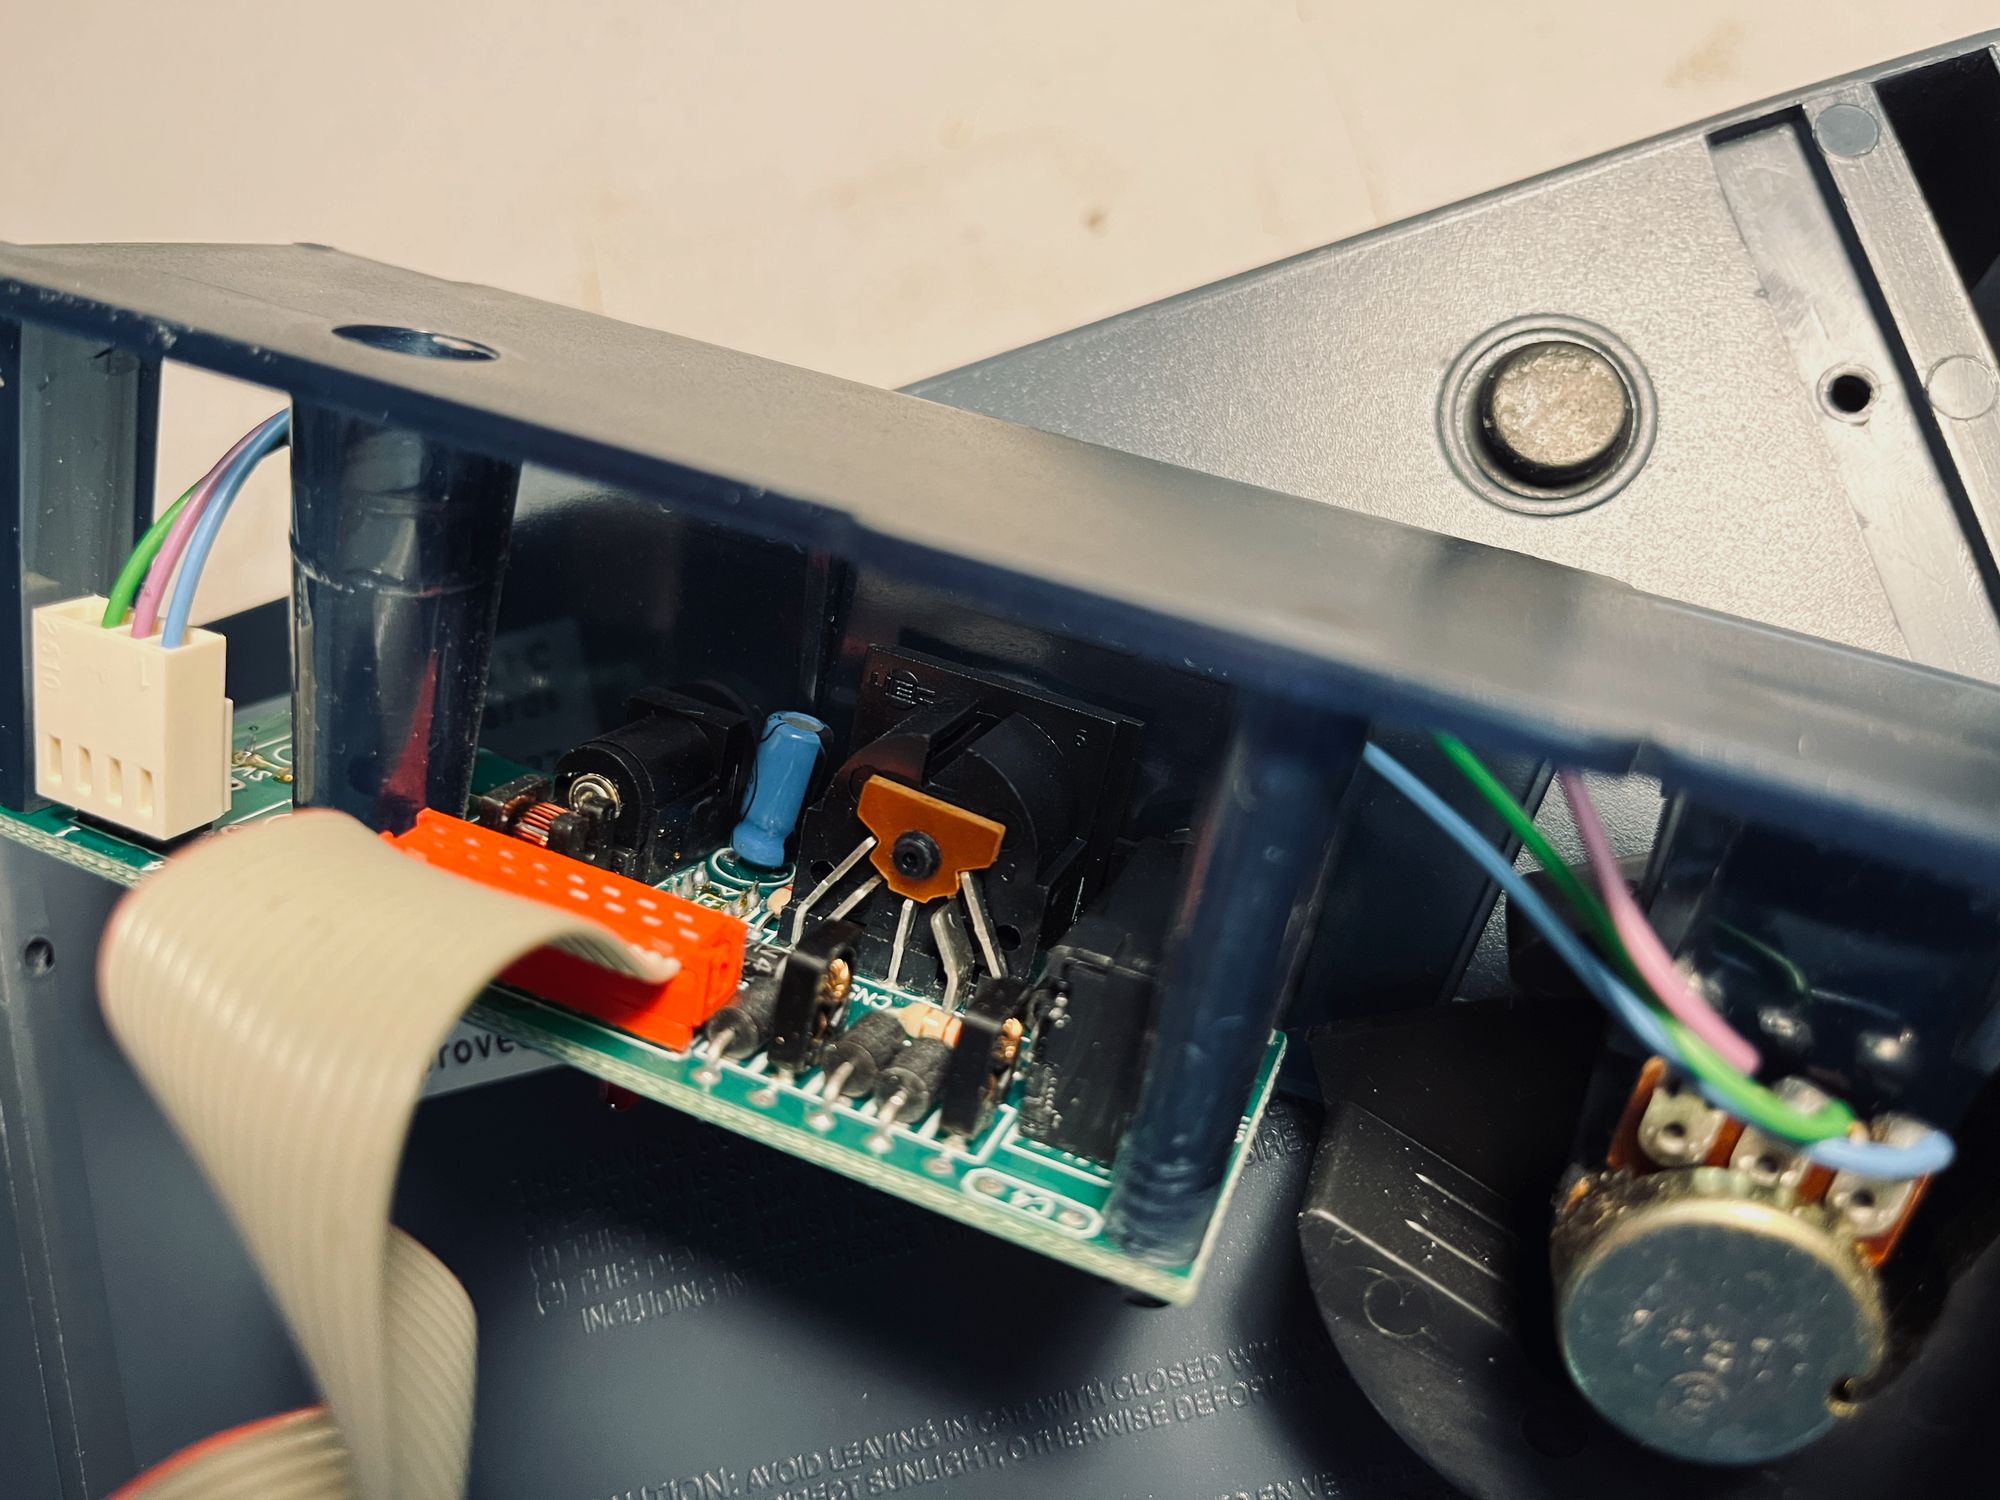
Hardware
A MIDI to CV converter is actually pretty simple to make with almost any microcontroller: take the MIDI message stream, calculate the voltage that maps to the incoming MIDI note and set this voltage on a digital analog converter (DAC).
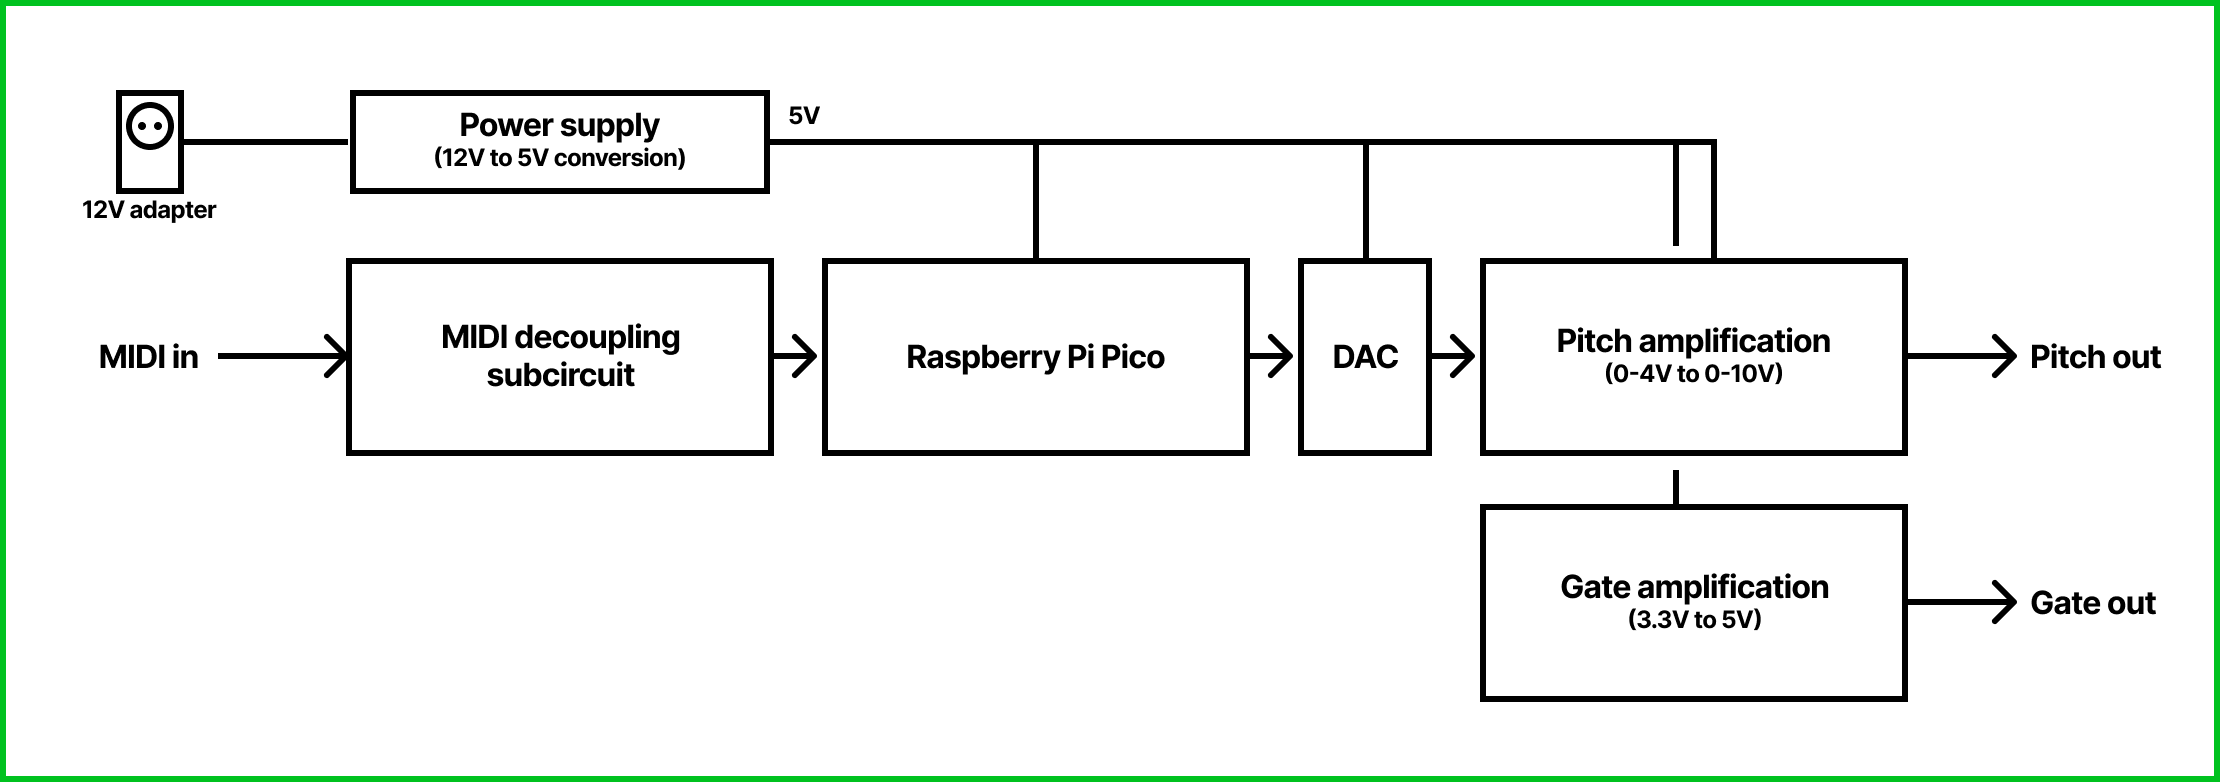
DAC can only output 0-4V but that doesn't really cover enough musical range so we need to amplify this to 0-10V. This results in 10 octaves which is more than a full range of a piano—certainly enough for me.
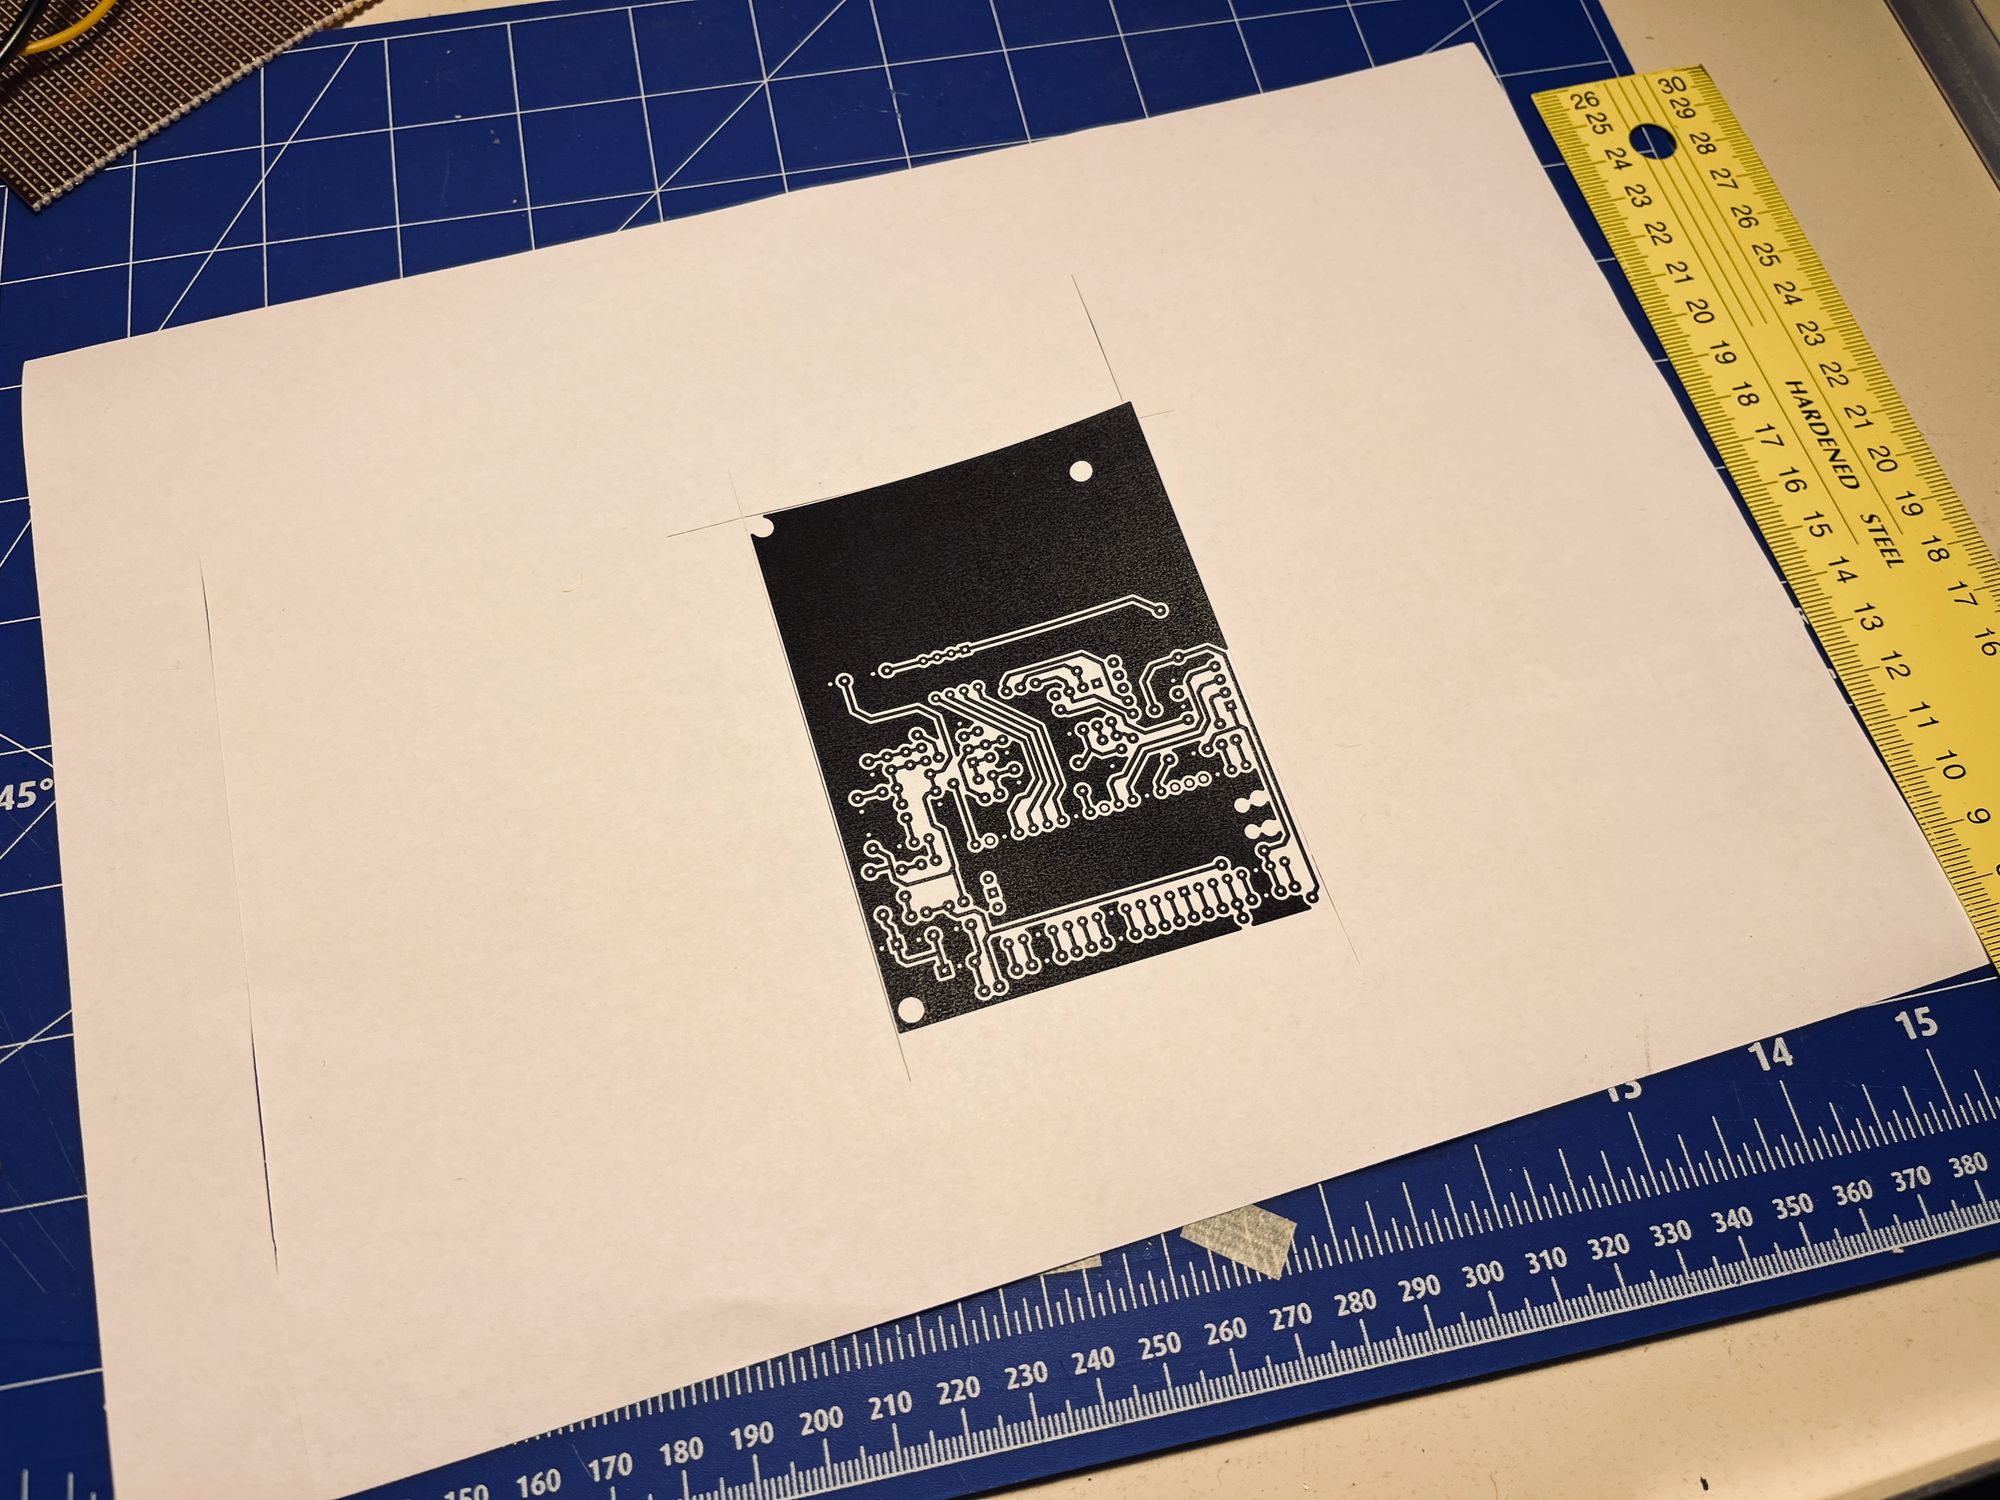
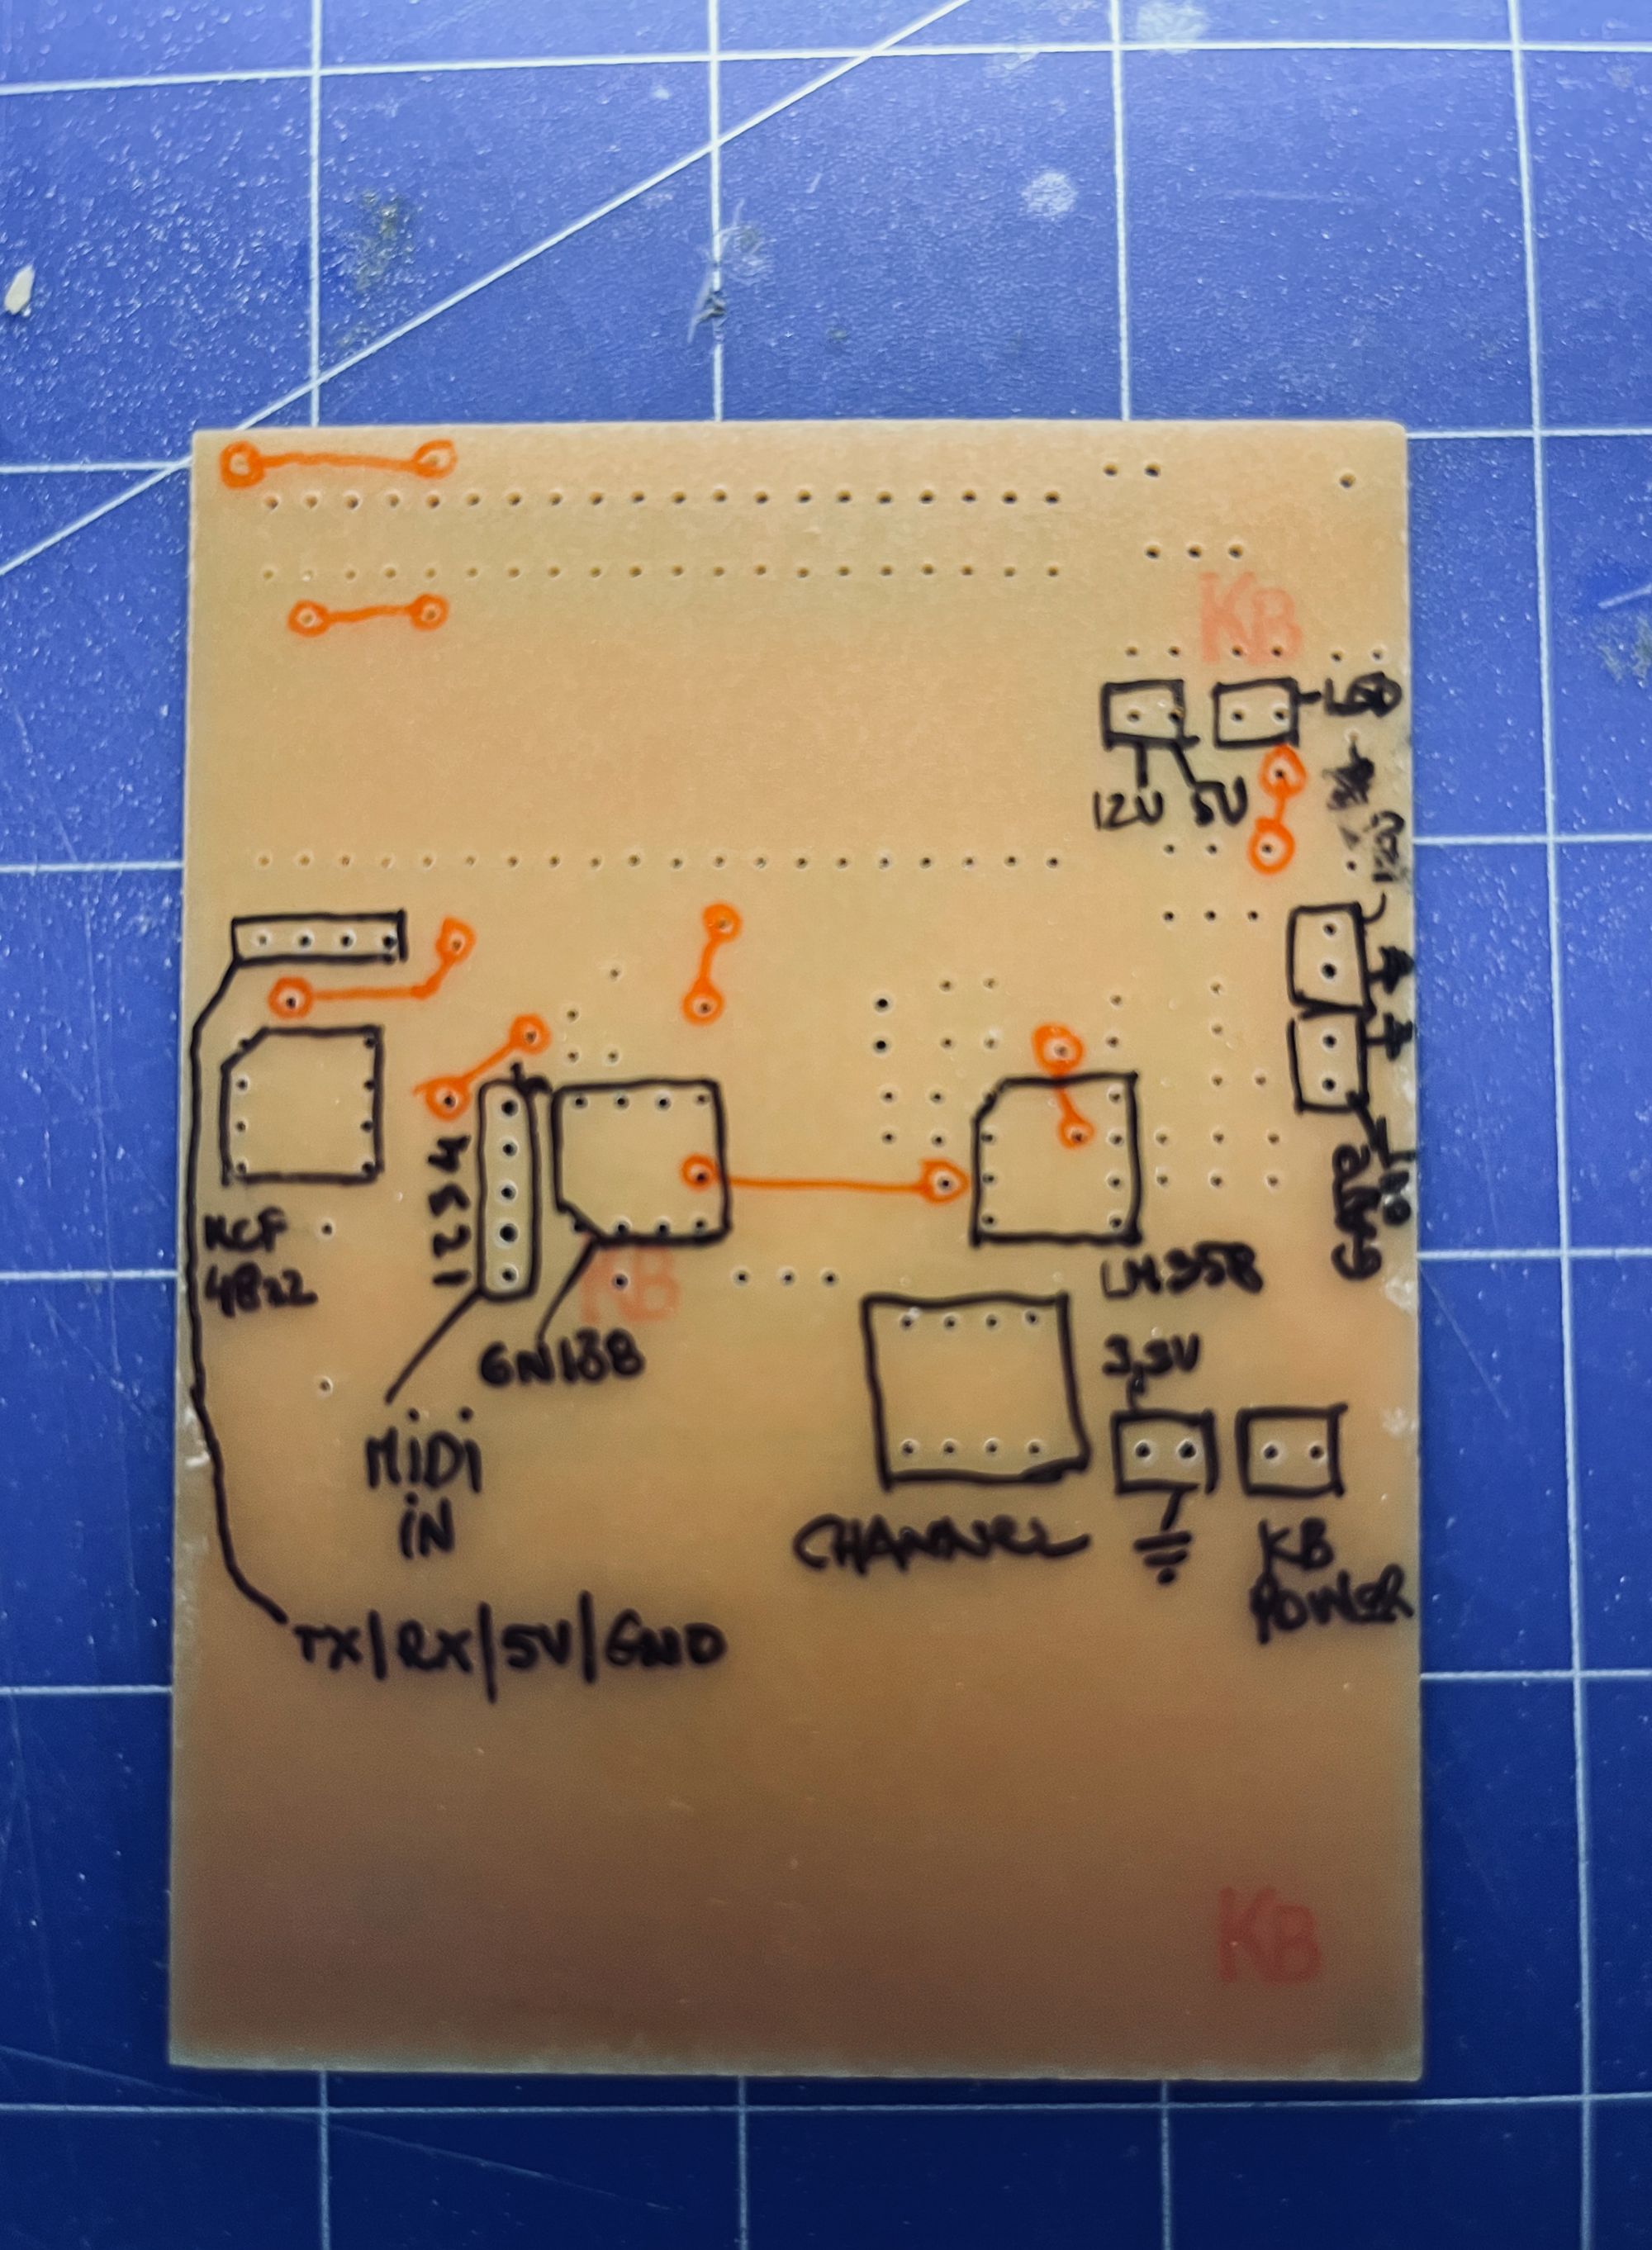
Home made PCB in the making
Here's the full schematic, you can download it in PDF or KiCad from the Github repo:

So what's going on here?
The top left monster on the schematic is obviously the Raspberry Pi Pico microcontroller. Most of the legs are not used and the ones used are pretty self explanatory. One thing to note though: I built a hardware pitch bend because the keyboard I took apart didn't have one. I used one axis of this joystick potmeter simply connecting GND to one end and 3.3V on the other, then using ADC0 / PIN #31 of the Pico I read the voltage and modify the pitch accordingly. The pitchbend range is set to 1 tone up and down but ofc. it's easy to change it in the code. As this joystick has a button too I'm planning to use it to build a basic sequencer or arpeggiator.
In the bottom left corner there's a standard LM7805 voltage regulartor [U1] with coupling capacitors, which converts the input voltage (12-32V) to 5V that is the power requirement of the microcontroller.
The incoming MIDI is connected through a standard 5 pin DIN connector [J_MIDI_IN_1]. They are decoupled from the circuit using a 6N138 optocoupler [U4], which in this case is needed to avoid ground loops. It's also a standard way to galvanically isolate the keyboard input from the rest of the circuit to avoid dangerous voltages.
U3 is a two channel DAC MCP4822, from which I only use channel A. The software is set up in a way that 10 octave maps to 0-4095mV. As said earlier this doesn't match the 1V/octave standard so we need to amplify this to the 0-10V range. That's what U2A – one half of a LM358 op-amp – is used for. It could happen that the output voltage shifts for certain values so I included a software calibration with which it's possible to fix these minor errors (see later).
The other half of the op-amp [U2B] is used to amplify the gate output to 5V from 3.3 and finally there's a LED to show when a keyboard is played because why not.
With the binary DIP switch in the middle, it's possible to set the MIDI channel of the system. Note that the range is 0-15 so channel 1 on the input matches the switch set to 0.
Software
I’ve already made a multi-channel MIDI to CV converter like this a couple of years ago for STM32 which I even started porting it to the Pico in January. I arranged the code this time to libraries so it can be much easily reused in the future.
This time however – due to chip shortage – I couldn't use any STM32 microcontroller so I went with something that is still available: the Raspberry Pi Pico.
I moved some reusable parts, like the ringbuffer, the midi parser or the DAC of the code to libraries. The main logic sits in the src/midi_to_cv.cpp file, more precisely in the MidiToCV::process method.
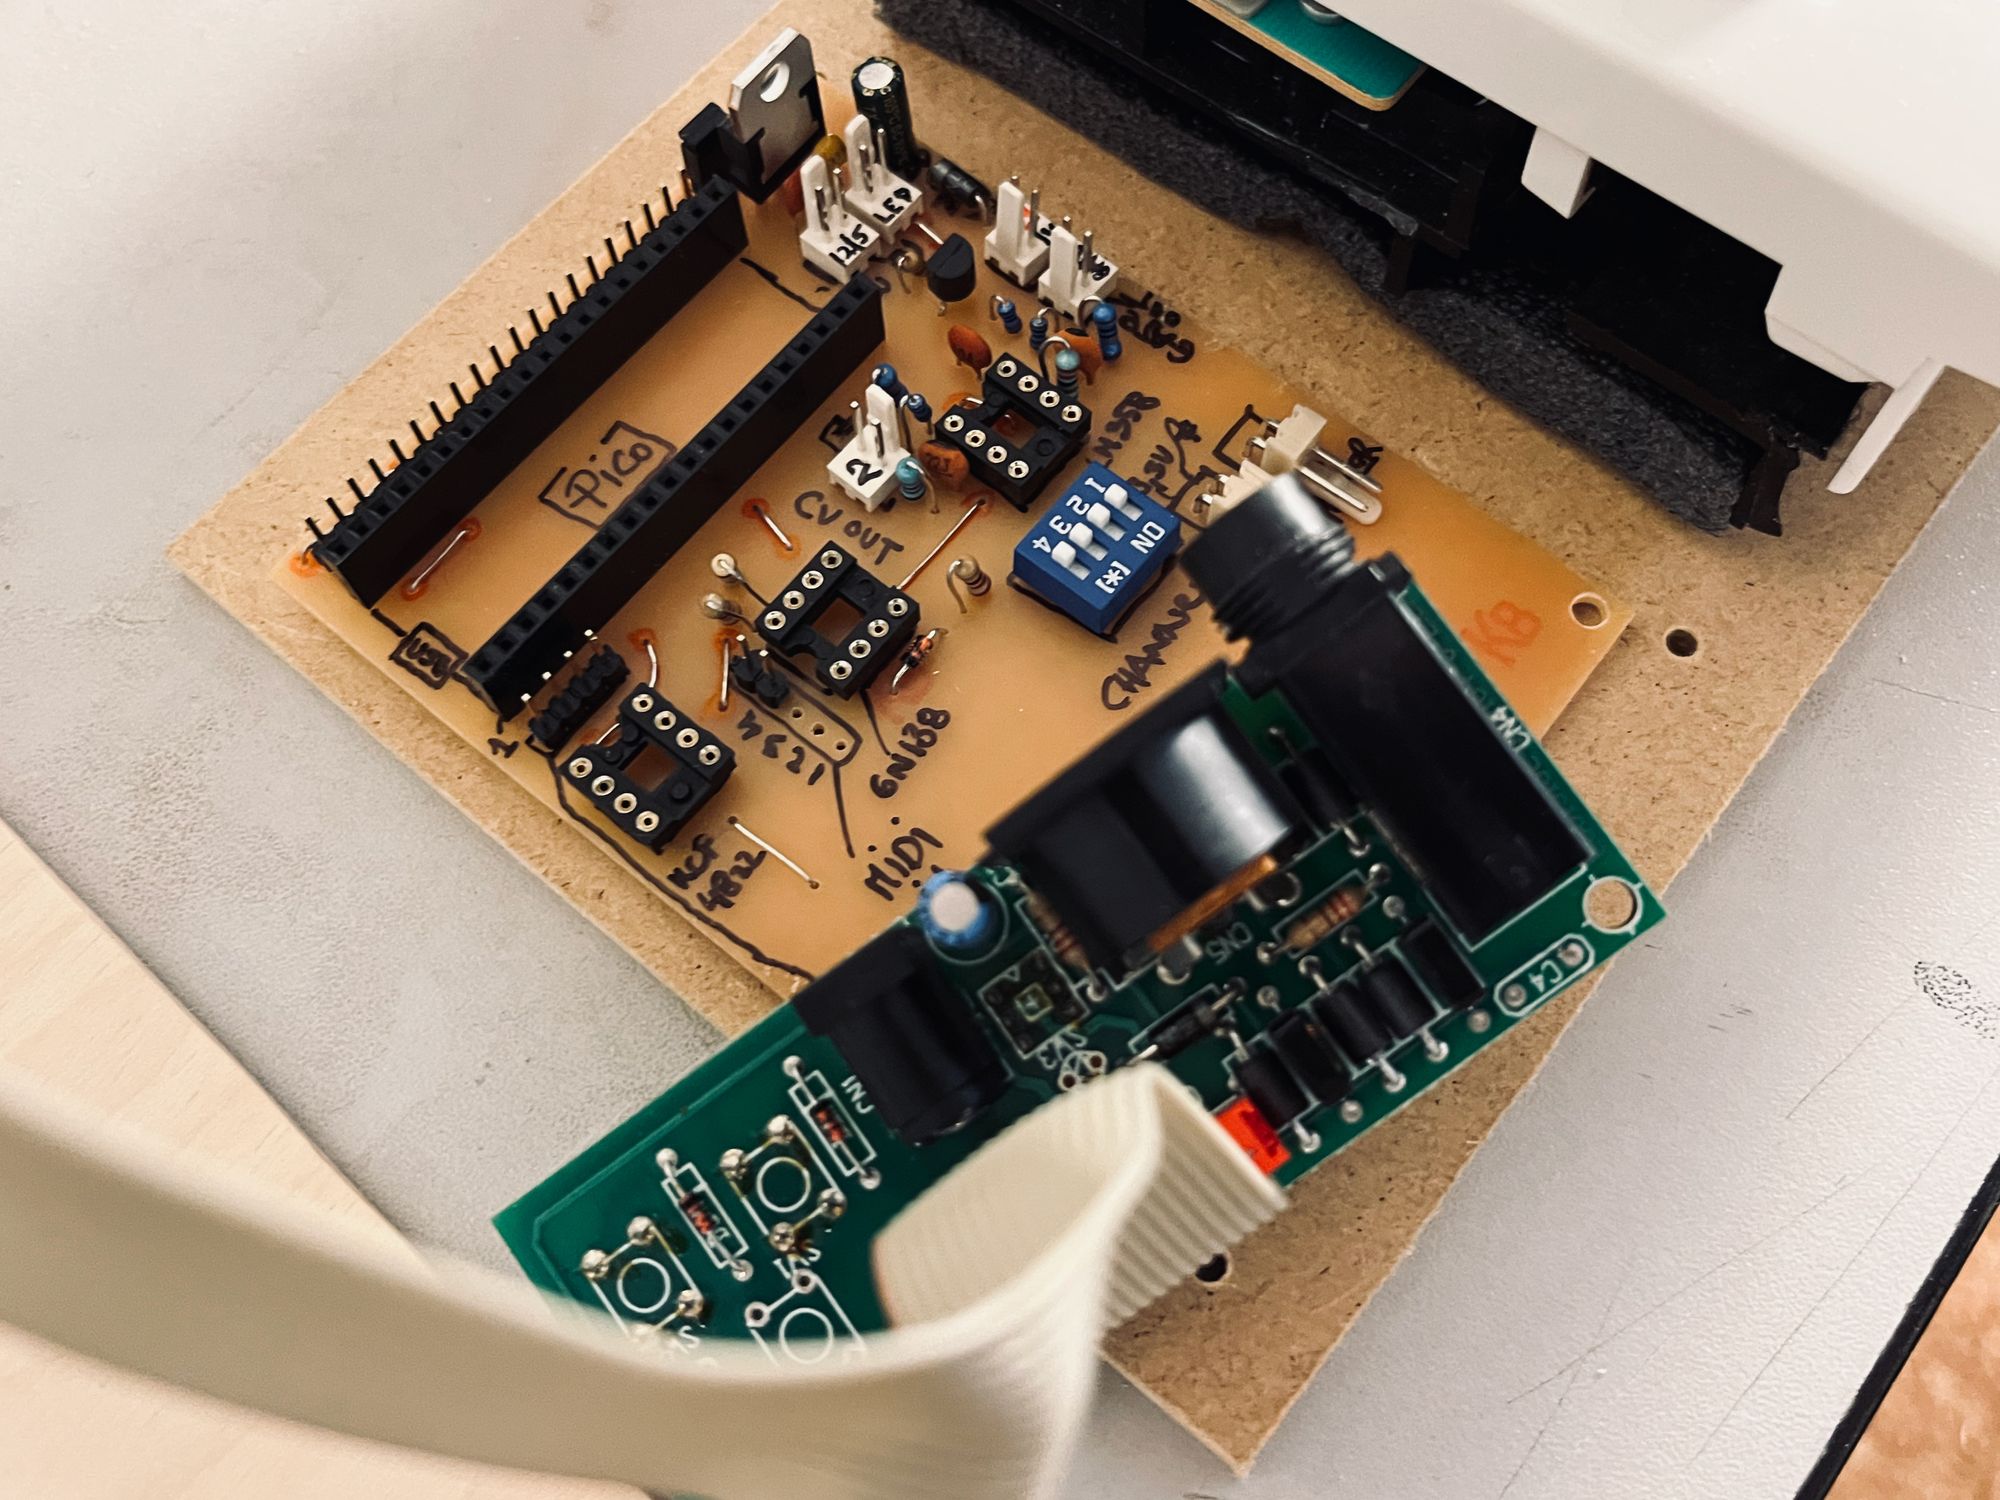
Case
The final step was to assembly the whole thing in some sort of a box. Usually my process for this is very improvisative and the inspiration source is mostly a walk in IKEA. I found a couple of ~1m² (10ft²) HDF sheets for 275 Hungarian Dollaz each (that's a bit more than 0.5 EUR). It is super easy to work with plus cheap and stiff enough for a temporary casing. I just ended up with a top and bottom cover with some spacers in between.